


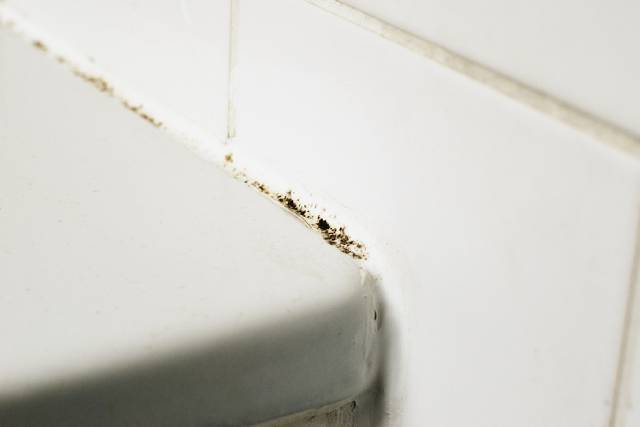
Mould around the bath. A damp patch spreading from the kitchen sink. A grout line that has turned black despite regular cleaning. These are problems most households encounter at some point, and more often than not, the culprit is a sealant joint that has failed, aged, or was never applied correctly in the first place. The fix is rarely complicated, but getting it right requires understanding what sealant to use, how to apply it, and what causes it to fail in wet environments.
Why sealant fails in bathrooms and kitchens
Bathroom and kitchen environments are among the most demanding for any sealant. Surfaces expand and contract with temperature changes, water sits against joints for extended periods, and many cleaning products are chemically aggressive. A sealant not rated for these conditions will degrade faster than you might expect.
The two most common failure modes are:
- Cracking — happens when a sealant loses flexibility over time, usually because it has aged or because the wrong product was used for a joint that experiences regular movement.
- Mould growth — a surface problem driven by moisture sitting on a porous sealant bead, giving airborne spores exactly the conditions they need to take hold. Standard silicone can develop mould on its surface even when the underlying seal is intact.
Silicone adhesive is the most widely used product for bathroom and kitchen sealing. It is waterproof, flexible, and adheres well to the smooth non-porous surfaces that dominate these rooms. For wet areas, always choose a silicone product that carries an anti-fungal or mould-resistant specification, as these contain biocides that inhibit mould growth and extend the time before re-sealing is needed.
Choosing the right product for each area
Not every joint needs the same sealant. Here is a straightforward breakdown:
- Shower tray, bath edge and basin — Use a neutral cure silicone with a mould-resistant rating. Neutral cure does not release acetic acid during curing, making it safe for use around natural stone, metal fittings and treated surfaces. Understanding the distinction between acetic cure and neutral cure silicone is essential before you buy, particularly if your bathroom features stone surfaces or exposed metalwork.
- Kitchen worktop joints and around sinks — A kitchen-grade silicone with anti-fungal properties handles regular water exposure, heat and cleaning products without degrading prematurely.
- Interior joints not directly exposed to water — Acrylic sealant is paintable, easier to apply neatly, and more forgiving on slightly irregular joints. Keep it away from areas with direct water contact, as it is not as waterproof as silicone over the long term.
How to apply sealant correctly
Surface preparation is the single biggest factor in sealant longevity, and this is where most DIY applications fall short.
Before you start:
- Remove the old bead completely using a blade or sealant removal tool.
- Clean both surfaces with isopropyl alcohol or a dedicated primer to remove residue, soap scum and grease.
- Allow surfaces to dry fully. Applying silicone over a damp surface is a reliable way to get a bond that fails within months.
During application:
- Run masking tape along both edges of the joint to keep the bead neat.
- Apply in a single continuous pass to avoid voids and weak points.
- Tool the bead immediately with a wetted finger or sealant tool to press it into the joint and ensure full contact with both surfaces.
- Remove the masking tape before the sealant skins over to get a clean edge.
After application:
- Allow the silicone sealant to cure fully before exposing it to water. Most silicones require at least 24 hours. Check the product datasheet rather than assuming.
Dealing with existing mould
If the bond is still intact but mould has appeared on the surface, a diluted bleach solution or dedicated mould remover applied, left to dwell and then rinsed off can clear it. This is a temporary measure. If mould has penetrated the bead or the bond has started to lift, removal and re-sealing is the only reliable solution.
Persistent mould recurrence after re-sealing usually points to a ventilation problem rather than a sealant problem. Poor air circulation keeps humidity elevated long after showering, creating ideal conditions for mould to return regardless of which product is used. Improving ventilation addresses the root cause rather than the symptom.
What to check before you buy
- Mould resistance — Look for anti-fungal or mould-resistant labelling for any joint in a wet area.
- Cure type — Neutral cure for natural stone and metal fittings, acetic cure for standard glass and ceramic where no sensitive materials are nearby.
- Movement capability — Expressed as a percentage of joint width. A higher movement rating reduces the risk of cracking in joints that experience thermal expansion.
- Paintability — Silicone cannot be painted over. If the joint needs to match surrounding surfaces, use acrylic sealant instead.
A good seal starts with the right product
Bathroom and kitchen sealant failures come down to the wrong product, poor surface preparation, or both. Taking the time to remove old sealant properly, choose a product rated for the specific conditions, and apply it correctly will give you a seal that holds up for years rather than months.
MOPI stocks a range of silicone and acrylic sealants suited to residential and commercial bathroom and kitchen applications. Whether you are resealing a single bath or specifying sealant across a larger renovation, our team can match you to the right product for your surfaces and conditions. Contact us today and let us take the guesswork out of your next sealant job.